
Fuzzigram Getting Started Tutorial
Welcome to the Fuzzigram tutorial. Click the button below to get started.
Overview
Fuzzigram is a platform to create, share, and manage the world’s most unique eCards and digital invitations. It all starts with our patented video maker where you’ll create a puppet voice and convert it into a video in seconds.
Click the Create A Video menu item and select a puppet. Next, you’ll create a voice for your character. You have two options:
Your Voice: Click the My Voice tab, select a voice changer, and click Record. You’ll have up to 20 seconds to record your voice. Click the button again when you are done. Your voice will be processed and when ready click the Play audio button. If you like how it sounds, click the Create button. If you’d like to retry your recording, click the Redo recording link.
Type it: Click the Type It tab, and select a voice to convert your text into. Type your script paying close attention to punctuation. You can type up to 200 characters. Click Create.

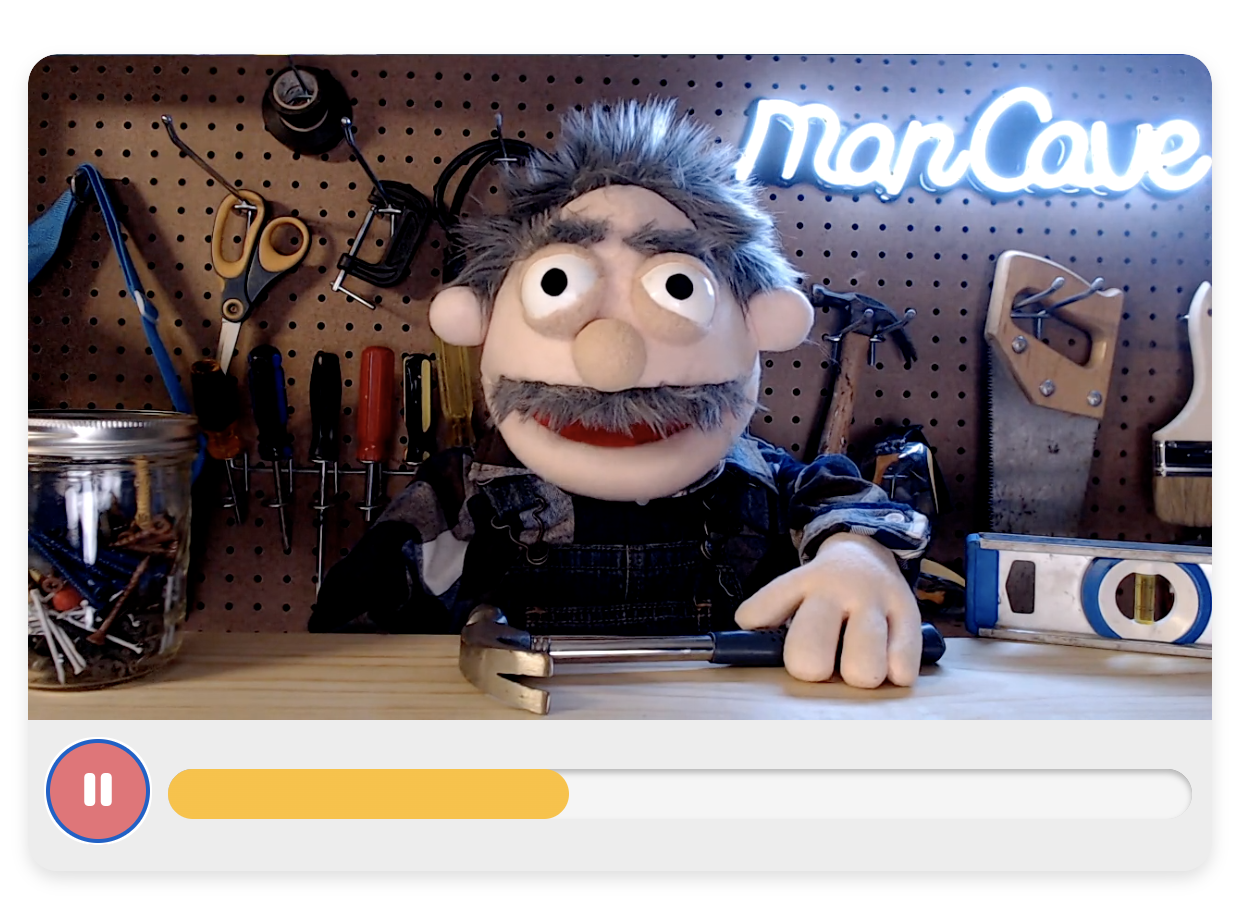
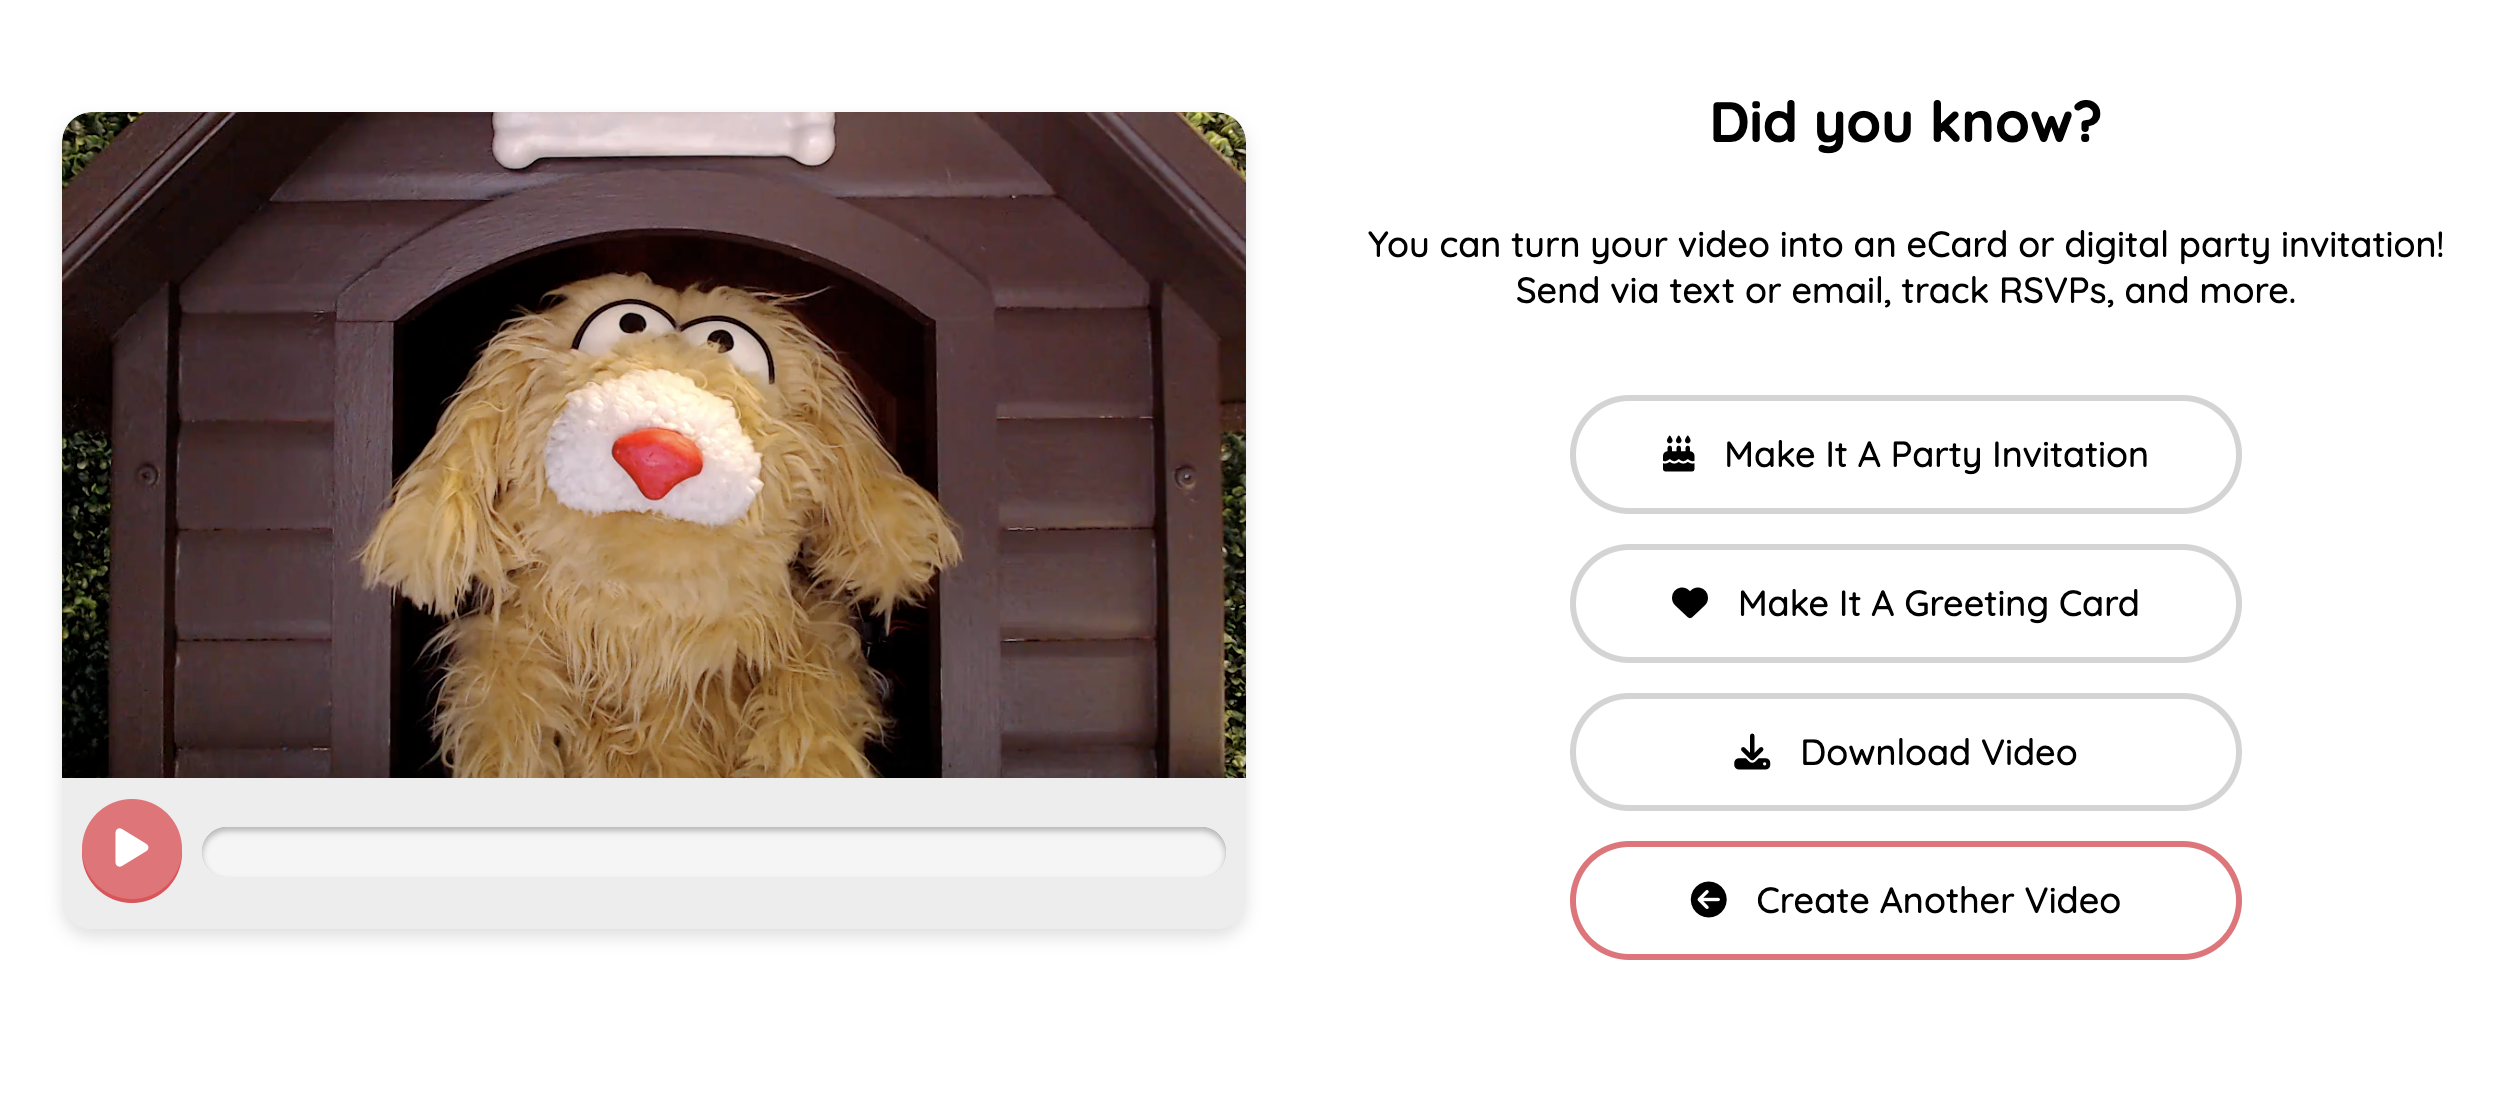
The puppet is now working to create your video. Watch the Puppet Tracker as your video is being built. Once your video is complete, click the play button to watch. Like what you see? Turn it into an eCard, digital party invitation, or download it!
eCards
Every eCard starts with a template. Go ahead and pick one. You can always change it later.

Click the Details tab:
Headline 1: Edit this text to change the main header information on the front of your eCard.
Headline 2: Optionally edit this text that may be present on the front of your eCard.
Message: Edit this text that will be the main body of text inside your card.
Signature Line: Sign your card here.

Click the Design tab:
Music: Select a genre and click the play button to preview a tune. If you’d like to add the song to your card, click the Add button. If you would like to remove music from the card, click the Remove button.
Templates: Modify your eCard template.
Page Background: Change the color of the background.
Envelope Color: Change the color of the outer envelope.
Envelope Liner: Change the liner of your envelope.

Click the Recipient tab:
Share card link manually: Click the Get button to generate a shareable link that you can send yourself.
If you would like Fuzzigram to send your eCard, complete the following:
From Name: Use a real name here. It will be used in the email or text message sent to your recipient. Make sure they know who it is from!
Recipient name: This is the name of your eCard recipient. Use their name so they know it is for them!
Recipient mobile phone: If you would like Fuzzigram to send the eCard via text message, enter your recipient’s mobile phone number here. Note: Only U.S. based area codes are supported.
Recipient email: If you would like Fuzzigram to send the eCard via email, enter your recipient’s email here.

Save your eCard: Click the Save button.
Preview your eCard: Click the Preview button and it will generate a link to view your eCard experience.
Like what you see? Click the Next button until you come to the Payment screen. Enter your payment information and complete the purchase. You will be prompted to send your eCard if you would like.

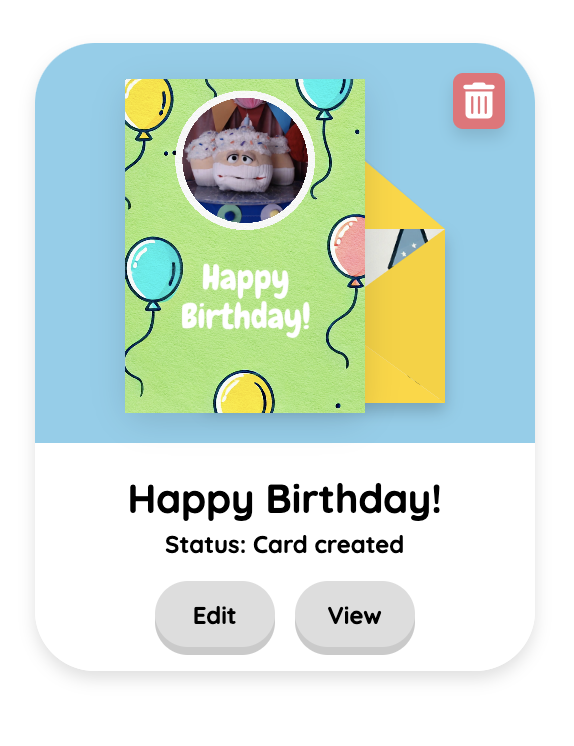
Navigate to the Greeting Cards page where you will see your eCards. From here, you can edit, preview, and delete the eCards you’ve created.
Digital Invitations
Every invitation starts with a template. Go ahead and pick one. You can always change it later.

Click the Details tab and edit the below information:
Event title: Edit this text to change the main header information of your invitation.
Event subtitle: Optionally edit this text that may be present on your invitation.
Event date: This will be the date of your event.
Event time: This will be the time of your event.
Hosted by: The name or names of the host(s). Important: This will be used in email and text message invitations. Be sure to use real names here so your guests know who the invitation is from!
Location name: The name of the location where the event will occur.
Street: The street portion of the event location address.
City: The city portion of the event location address.
State: The state portion of the event location address.
Zip: The zip code portion of the event location address.
Host phone: Optionally, add the host’s phone number that will be present on the invitation for guest’s to contact.
Optional note: Add an optional note for guests that will be present on your invitation page and provide additional information for your event.
Registry recipient’s name: Optionally, add the name of the gift registry recipient. Often this is someone’s name.
Registry url: Optionally, add the url link of the gift registry. Both the registry name and url will be present on the invitation if this information is provided.
Event options: Adjust these settings to customize your invitation experience:
Guests can bring others: This will show on the invitation to let guests know if they can bring a friend.
Kids are allowed: This will show on the invitation to let guests know if they can bring children to the event.
Guests can see attendees: If toggled on, this will allow guest to see the list of attendees on their invitation and the status of their RSVPs.
No gifts: This will show on the invitation to let guests know if the host would explicitly ask guests not to bring gifts.
Guest Book: If toggled on, guests can post and view messages in the Guest Book of your invitation.
Notify me of event activity: If toggled on, you will receive email notifications when guests post messages and more.
Notify me when guests RSVP: If toggled on, you will receive email notifications when guests RSVP to your invitation.

Click the Design tab:
Music: Select a genre and click the play button to preview a tune. If you’d like to add the song to your invitation, click the Add button. If you would like to remove music from the invitation, click the Remove button.
Templates: Modify your invitation template.
Page Background: Change the color of the background.
Envelope Color: Change the color of the outer envelope.
Envelope Liner: Change the liner of your envelope.

Click the Guests tab:
Share invite link manually: Click the Get button to generate a shareable link that you can send yourself. Any guest can use this link. They will be prompted to add their first name, last name, and email when they RSVP.
If you would like Fuzzigram to send your invitations, click the Add Guest button and complete the following:
Guest name: This is the name of your guest. Use their real name so they know it is for them!
Guest mobile phone: If you would like Fuzzigram to send the personalized invitation via text message, enter your guest’s mobile phone number here. Note: Only U.S. based area codes are supported.
Guest email: If you would like Fuzzigram to send the personalized invitation via email, enter your guest’s email here.
Click the Save button.
You can delete guests via the trash icon, if they haven’t been sent an invitation yet.
Continue to add guests to your guest list. You can add up to 100 guests.
Save your invitation when you are done.

Save your invitation: Click the Save button.
Preview your invitation: Click the Preview button and it will generate a link to view your invitation experience.
Like what you see? Click the Next button until you come to the Payment screen. Enter your payment information and complete the purchase. You will be prompted to send your invitations if you would like.

Navigate to the Party Invitations page where you will see your invitations. From here, you can:
Edit your invitation: open your invitation and make modifications. After saving, you can optionally notify guests that your invitation has changed.
View your invitation experience: This button will launch a preview of your invitation.
View & Add Guests: Click on this option to open and manage your guest list.
Guest Book: Click on this item to open your guest book posts. From here you can reply to and delete posts from your guests.
Send A Message: Click on this item to open the event messaging feature. Enter your message and select the types of guests that you would like to message. Options include All Invitees, Guests Attending, Guests Not Responded, Guests Maybe Attending, and Guests Not Attending. Optionally, select whether you would like your message to post on your Guest Book for all invitees to see. Once you click Send, the applicable guests will receive the message via the same method they received your invitation (email or text message).
Cancel Event: Click this button to cancel your event. After you confirm you would like to cancel, a prompt will ask if you would like to send guests a cancellation notification or just cancel the event without sending a notification
Attendee tabs: Each event has colored tabs indicating Yes, Maybe, No and Pending statuses. You can click on these tabs to view the guests in each status. You can also click the View & Add Guests button to see your full guest list.
